Friday, December 30, 2011

Balloon Burst Fireworks

This New Years craft activity was inspired by a project I saw done on Play School a few months ago. On the show they tied string between two chairs, filled balloons with dry tempura paint powder and popped them over glue covered paper to make patterns.
We have a few big cardboard boxes left over from Christmas present packaging so today we cut the sides from one of the boxes, painted them black and used the Play School balloon concept to make some glittery firework art for the wall.

WE USED:

* large sheets of cardboard or paper
(we cut the side from a box)
* black paint or paper
* craft glue
* paintbrush
* glitter/sequins
* balloons
* two chairs
(or somewhere to tie your string)

* string/ribbon/twine/wool
* peg
* needle or similar sharp item for popping balloons

recommended :

* balloon pump for inflating the balloons.

After we had cut our cardboard to size we painted the sheets with black paint to make a 'night sky'.


Then we tied our ribbon to the backs of two chairs to create a tightrope. Make sure you have enough space underneath for your cardboard/paper.
I would definitely recommend doing this activity outside - it's very messy! You could use a drop sheet to make clean up even easier.

Next we filled our balloons with the sequins and glitter. We used four balloons for one artwork but you can use as many as you like. We put one colour of glitter per balloon but mixing the would be a fun option too.
To get the glitter/sequins in to the balloons you could use a funnel, we found the sequins easy to just pour into the top though.

The glitter was also easy to put inside the balloons, we just pushed the dispenser into the top of the balloon and the girls were able to fill them by themselves by turning them upside down and shaking gently.
Once your glitter is inside the balloon you can inflate them and then tie them off.
I would recommend using a balloon pump for this stage, inflating the balloons by mouth with glitter inside could be dangerous and lead to inhalation.


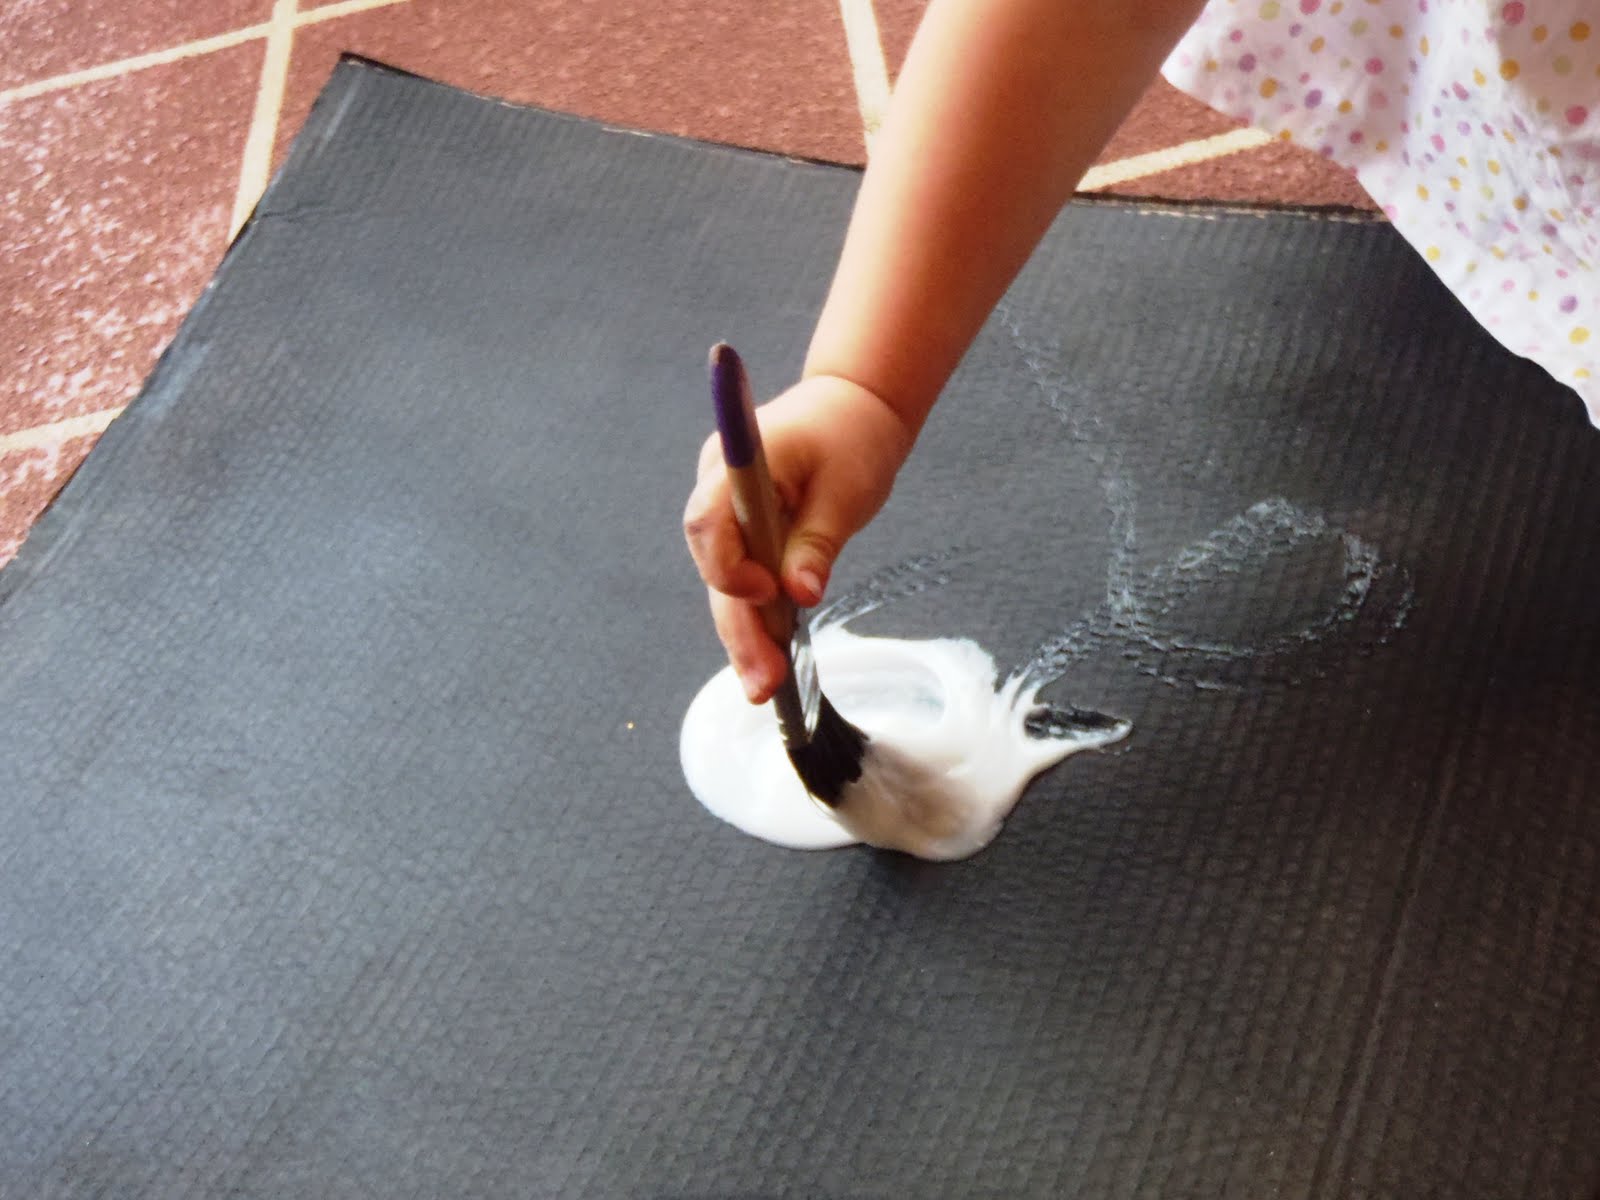
We then covered our black cardboard with craft glue.

The glue covered sheets were positioned underneath the line and we then hung our glitter balloons over the top using some pegs.

One by one the girls popped their balloons to create a glittery fireworks effect. It was beautiful watching the balloons explode and all the shimmery bits rain down, similar to the real thing!

Squeak loved this activity but Bubble (who is sound sensitive) opted to use shakers to make her fireworks rather than popping balloons. She watched that action from a safe distance away instead! :-D

The finished artworks were very pretty.

We hung our decorated cardboard sheets using a bulldog clip and a removable 3M hook. We use this technique a lot as it makes hanging bulky art works really easy.

All the best for 2012, we look forward to sharing more craft and learning fun then! Wishing you all a happy and healthy New Year :-)


Classified: Mom

Monday, December 26, 2011

Ideas For Celebrating New Years

What kind of things does your family do to celebrate New Years? This year we will be incorporating a lot of our old favourites and adding in some new activities as well.
A few of our old posts containing ideas we will be including in our New Years celebrations this year;

Moon Balloons:
Always a hit with our girls and any other little (and big!) people who come to visit.


Glow In The Dark Ring Toss:
We'll be playing this outside this year weather permitting.


Glow In The Dark Hide And Seek:
Another old favourite that we'll be trying out outside in the backyard.


Marble Lights:
We'll be using glass stones as well as marbles this year to get some different effects.


Streamer and Plastacine Lanterns:
We'll be experimenting with glue and glitter this year for a sparkly fireworks effect.


Animal Spotlight:
Instead of animal pictures we'll be putting up photos from our year and having a memory lightshow on New Years Eve.


Saturday, December 24, 2011

Recycled Christmas Card Puppets

We have a lot of Christmas cards from previous years in our craft box and this week we used them to create some Christmas themed pop stick puppets.
We have made these before (post here) using recycled books, but this time Bubble was able to make them almost all by herself. Squeak wasn't interested in the making part but she has played with the puppets incessantly, so I'd say they were a success for both of their age groups!

WE USED:

* old Christmas cards
* pencil
* scissors
* blu tack/sticky tack
* pop sticks

Firstly we cut our Christmas cards down the middle, keeping the 'sentimental' side with all of the writing and using the fronts of the cards for our craft activity.

Bubble picked out the cards she wanted to turn into puppets and I drew outlines for her to cut around using a lead pencil.

Bubble then used BluTac to attach her pictures to pop sticks to create her puppets.


Our puppets were even more fun in some play dough 'snow'.
She ended up making 16 of these, it is definitely one of her favourite craft activities from the last few weeks!

Playdough Snowman

Earlier in the week we made some vanilla scented play dough (instructions in this post from last year) which the girls have been using for all sorts of Christmas play. Today we used it to make snowmen and decorated them using beads and buttons - they turned out pretty cute!

WE USED:

* play dough
* beads and buttons

First we rolled our dough into balls to build our snowmen, then the girls used their beads and buttons to decorate them.
This was an excellent activity for developing fine motor control and imaginary play.


Scrubbing Brush Christmas Tree

Hmmm not a very glamorous sounding post title, but I'm not sure what else to call it! This was not only fun (it involved paint and stickers, how could it go wrong ;-D) but was also a great fine motor activity.

WE USED:

* large sheet of paper
(we taped together A4 sheets)
* brown paper
* green paint
(we mixed some ordinary green paint and some green glitter paint together to get a nice effect)
* scrubbing brush
* heavy dish for paint
* glue
* scissors
* stickers

We put our green paint into a heavy dish so the girls could dip the brush in easily.

I tacked our paper onto a window to make any accidental paint swipes easy to clean up, then we cut a tree 'trunk' from some brown paper and glued it on.
The girls then added the leaves to our Christmas tree using their scrubbing brushes (which they thought was utterly hilarious).

Great job girls!

I helped Bubble to draw a star shape on some yellow sticker sheet and she cut it out to put on top of our tree.


Then it was time to decorate our tree. We used small dot stickers but you could use anything really! Glitter glue pens, silver ink pens, paint dabbers - you could get all sorts of beautiful effects.


Our finished tree ready to hang on the wall.

I especially love the AWOL baubles in the corner :-D

Jingle Bell Balloons

We added a bit of a festive twist to our Wobble & Shake balloons this week. This activity was a hit with both girls and was great for both gross and fine motor as well as providing sensory fun.

WE USED:

* balloons
* small bells
(available from craft/discount stores)
* balloon ties

This activity was very easy to put together, we just pushed small bells into the balloons (we put two bells in each), inflated them and tied them off using twist ties so that the balloons could be reused again.


The girls had a blast kicking, throwing and shaking them to make them jingle.

Cheap and easy Christmas fun :-)

Friday, December 2, 2011

Christmas Cracker Count Down

Between work, appointments for the girls and life in general December has snuck up on me! We put up our felt Christmas Tree Countdown from last year but I needed a quick and easy 'treat advent' to put together for the girls too (after all what's Christmas without a few treats?! ;-D).
I found some Christmas crackers on sale just in time and we managed to sneak it in - whew!

WE USED:

* 24 cheap Christmas crackers
(we found ours in a major retail store for $1.50/box of 6. Alternatively you could make your own using toilet rolls like we did HERE last year)
* small treats
(we used miniature Santa chocolates and stickers)
* blank label stickers
* pen/marker/pencil

We managed to find all of our Christmas-y things on sale and spent way under $10 on this activity. You could bring this even lower by making your own crackers/fillers.

Using a pen Bubble wrote the numbers 1-24 on our labels (we only had long rectangular labels on hand so we cut them in half).

We opened up one end of each cracker by gently untwisting it.

We were then able to add our advent treats inside. You could use tweezers to remove the hats/jokes/toys from inside to make more room but we left them in there.

We added two chocolates and two stickers to each cracker.

The girls then added the count down number stickers to the front, one for each cracker.


Each day they get to pull a cracker together and we're one day closer to that magical Christmas night! :-)

Shibley Smiles